 Ever since I saw these adorable snowmen truffles at Cookies and Cups, I have wanted to make my own cute truffles. With Easter just around the corner, I thought bunny truffles would be just the ticket! For making them I basically followed the same procedure that Shelly did with the snowmen, but only stacked these cookie truffles two-high instead of three. I had two boxes of Girl Scout Thin Mints cookies in the freezer and decided to put one of them to good use:)
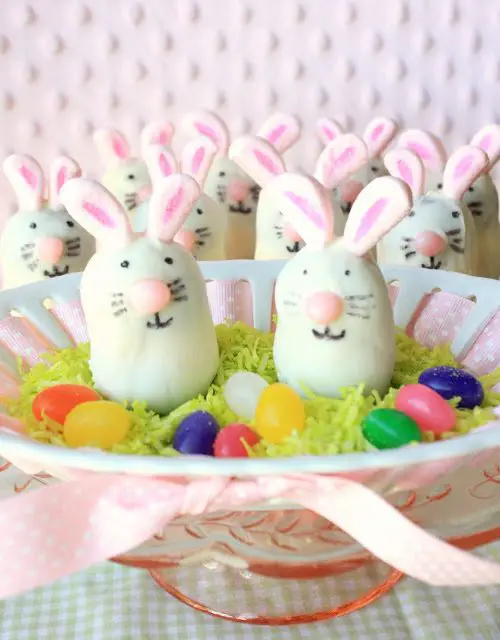
We all know how fast bunnies multiply, right? Here’s some proof:)
I had a bit of a hard time getting the candy melts as thin as I wanted, so the bunnies are a little more full- figured than I had envisioned, but they still look pretty cute.
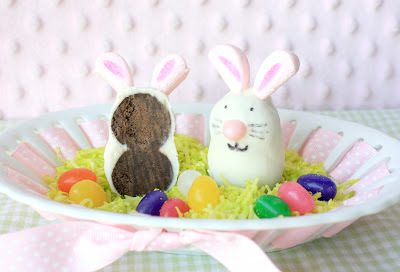
A cross-section of a bunny truffle.
As I mentioned (and as you can see), each bunny is stacked two truffles high. For the ears, I had a bag of pink heart marshmallows on hand which I simply cut in half with my kitchen scissors. I detailed the ears with a pink food marker. I wasn’t very happy with my black edible markers on this treat; they (I had four available) seemed to dry up quickly, and the tips spread out so that the details were not as fine as I wanted them to be.
Even so, I think these bunny truffles are going to make some munchkins very happy! Mr. Munchkin Munchies ate one and thought it was sooooo good!
They really are delicious!
Bunny Truffles
Ingredients:
1 box (9 ounces) Girl Scout Thin Mints cookies (or other chocolate mint cookies) 1 cup chocolate frosting 1 bag white candy melts (14 oz.) 12 pink heart shaped marshmallows (You could easily cut and shape a regular marshmallow with scissors to form ears), plus a couple of extra for bunny tails 6 small pink jelly beans Pink and black edible markers Toothpicks
Directions:
1. Place all of the cookies in a food processor and process into fine crumbs. Add 1 cup of chocolate frosting and mix in food processor until thoroughly blended. 2. Use a small cookie scoop and form into balls (you will have to smooth them out with your hands). Makes 2 dozen. Set the truffles on a baking sheet lined with wax paper. Set them in the refrigerator to chill/firm, at least 15 minutes. Prepare the bunny ingredients while the truffles chill. 3. With kitchen scissors cut the pink hearts in half vertically, directly down the middle, producing two “ears” and set aside. (With regular marshmallows cut them vertically in half, and then in half again to end up with four long ears.) Use the pink edible marker and add detail to the ears. set aside. 4. Snip small bits of marshmallows to fashion into cotton tails for the bunnies. 5. With the kitchen scissors (or a small, sharp knife) cut the jelly beans in half and set aside for the noses. 6. Get the mint truffles from the refrigerator. Melt the candy melts according to package directions in a small deep bowl. 7. Take two truffles and stack one on top of the other. Stick a toothpick down the middle of both truffles, but leave about an inch poking out of the top. 8. Holding the toothpick, dip the stacked truffles into the melted candy until completely coated. Let the excess drip off over the bowl. Set the “bunny” on wax paper and be sure to gently remove the toothpick before the candy completely dries (If it leaves a hole, just fill it with more melted candy). 9. Place the marshmallow bunny ears on the bunny’s head (while candy mels are still wet) and hold them in place until they stay put (It took only about 10 seconds). 10. Usee half of a jelly bean and place it for the bunny’s nose. Do the same thing for the tail. After the candy is completely dry, use the black edible marker for the details on the bunny’s face: eyes, whiskers and mouth.
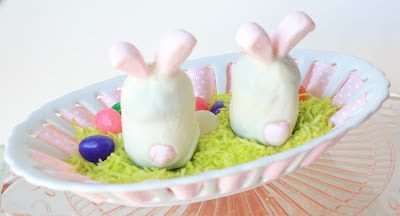
FYI: Coconut (tinted green) was used for the bunny truffle display.
Makes 1 dozen bunny truffles.
Admire your bunnies before eating:)
THE END
Linked to:
I’m Lovin’ it Fridays
Weekend Wrap Up Party
Kitchen Fun and Crafty Friday
Inspiration Friday
Sweets for a Saturday
Tea Party Tuesday
Crazy Sweet Tuesday