 I can’t believe I finally figured out how to do a collage (Thanks to a great tutorial by Cheryl of Tidymom contributing on Beautiful Blog Designs), and retrieve it! It proves that you can teach an old grandma new tricks! Ha ha!
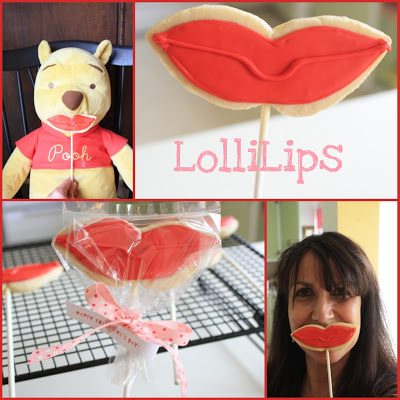
Unfortunately, I didn’t have a cute model available as I did here for my mustache cookies. I grabbed my resident Pooh, but he looks a little bit creepy, so I reluctantly resorted to myself (not much better:)) to show you the LolliLips cookie in “action”.
I came across these cute treats (at Blonde Designs), remembered my mustache cookies on a stick, and then the light bulb came on…to do the same thing with cookie lips, for Valentine’s Day! The Blonde Designs post (linked above) includes templates and little tags for the sticks(in my photo), but I just used my own freehand mustache template and turned it upside-down:)
I used my sugar cookie recipe with royal icing(both recipes found on my blog, here.)
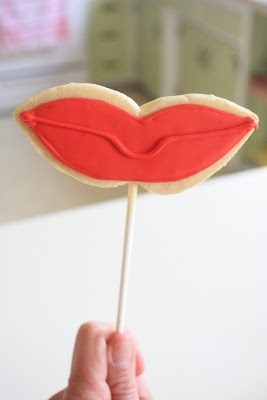 It’s a pretty simple process, but just in case you need some help: 1. Trace and cut out the template on card stock (I actually used a file folder). You can also use thin cardboard or a stencil sheet. 2. Roll out the cookie dough and place the template on it. Cut around the template with a small, sharp knife. Do as many as you can on the rolled out dough. Place the cut out lips on your baking sheet, keeping in mind that you will be inserting the lollipop sticks into them before they are baked, so place accordingly. ( If the knife made the edges of your cookie a little ragged, smooth around the edges with your fingers.) 3. Once on the baking sheet, insert the sticks into the bottom, center of each cookie, about halfway. I have inserted them after they are baked when they are still soft, but I prefer it before, and haven’t had any problems. 4. After they are baked, let them cool for a bit on the baking sheet, and then transfer to a cooking rack with a spatula, not by the stick. You want to make sure it is completely cool and set before you pick it up by the stick. 5. Once cooled, decorate with the royal icing…outline, fill in, add details. Let icing dry for a bit between each step, especially before you add the lip detail.
Have FUN with your LolliLips!


This post is also linked to Allison’s SWEET TOOTH FRIDAY!