Fall has been my favorite season for a long time! Winter used to be my favorite, specifically the month of December, due to my birthday and Christmas, but ever since I’ve been an adult, I enjoy fall more. I like that it seems more drawn out, and slower paced than Christmas. I love the feel of fall, which I can’t even describe, except to say that the air is more brisk, but there is a definite feel to the season.
I enjoy the time with family, all the baking with pumpkin, apples, cinnamon and nutmeg, the visits to the pumpkin patch, picking apples, and I enjoy the cookies…the Halloween cookies, Thanksgiving cookies, and just fall cookies in general. I’m hooked!
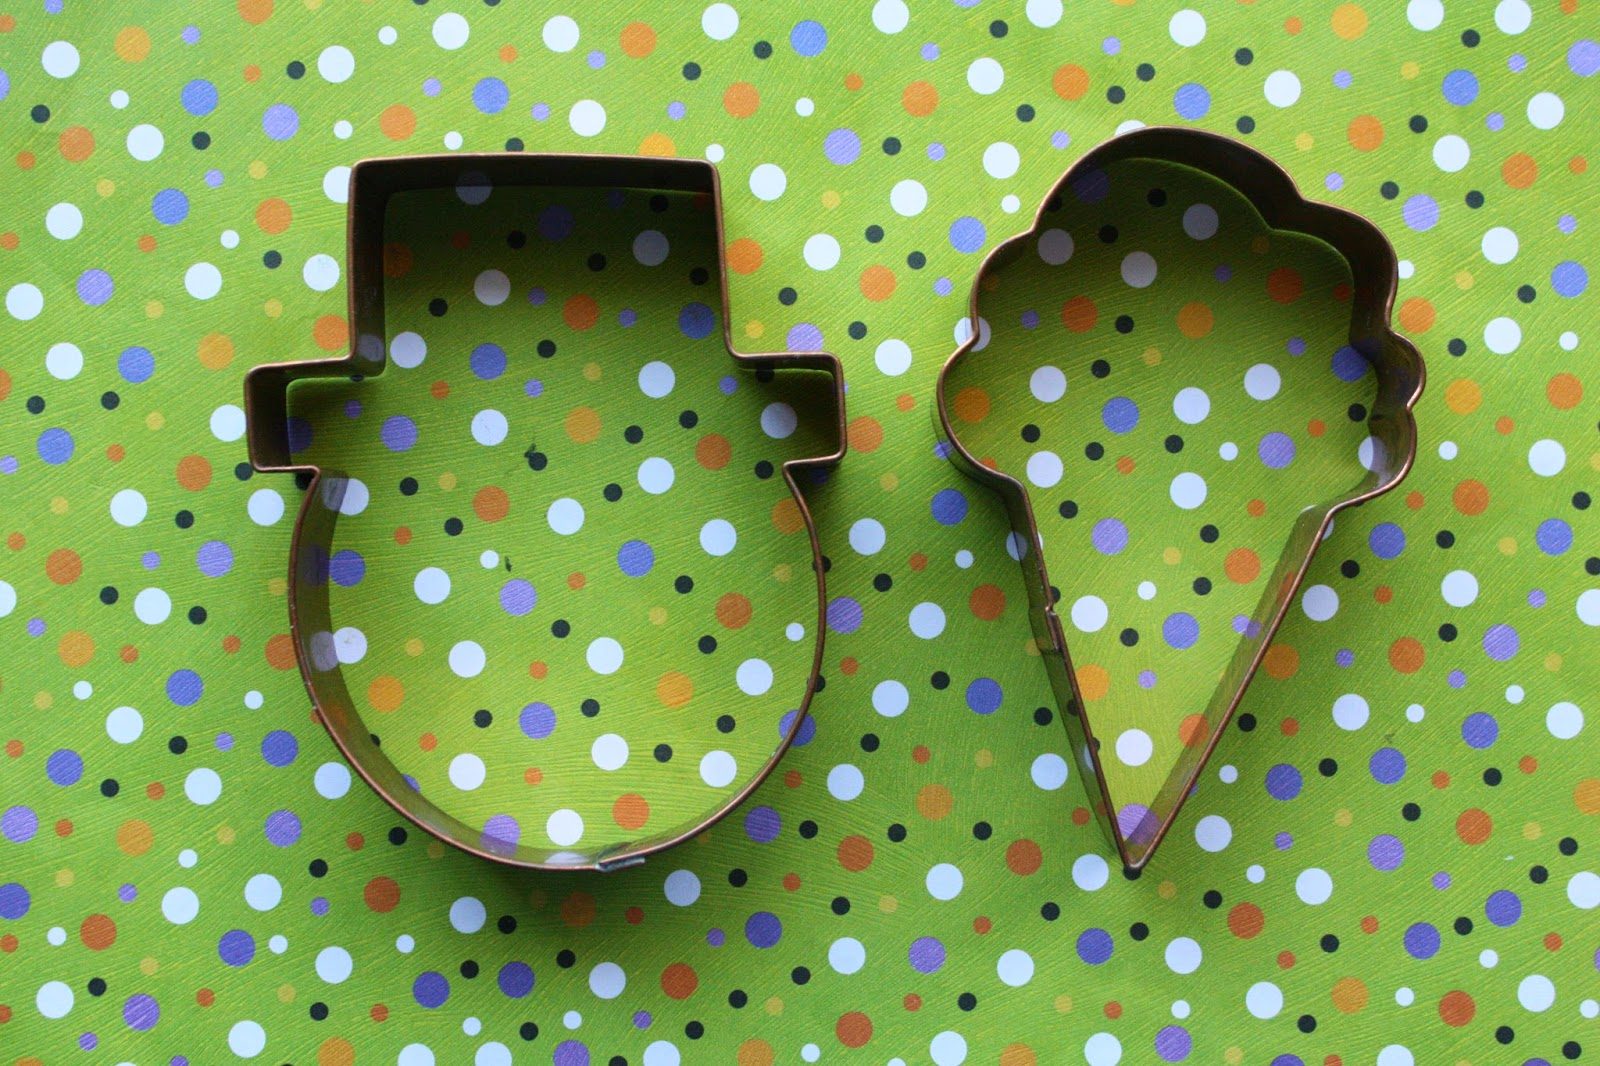
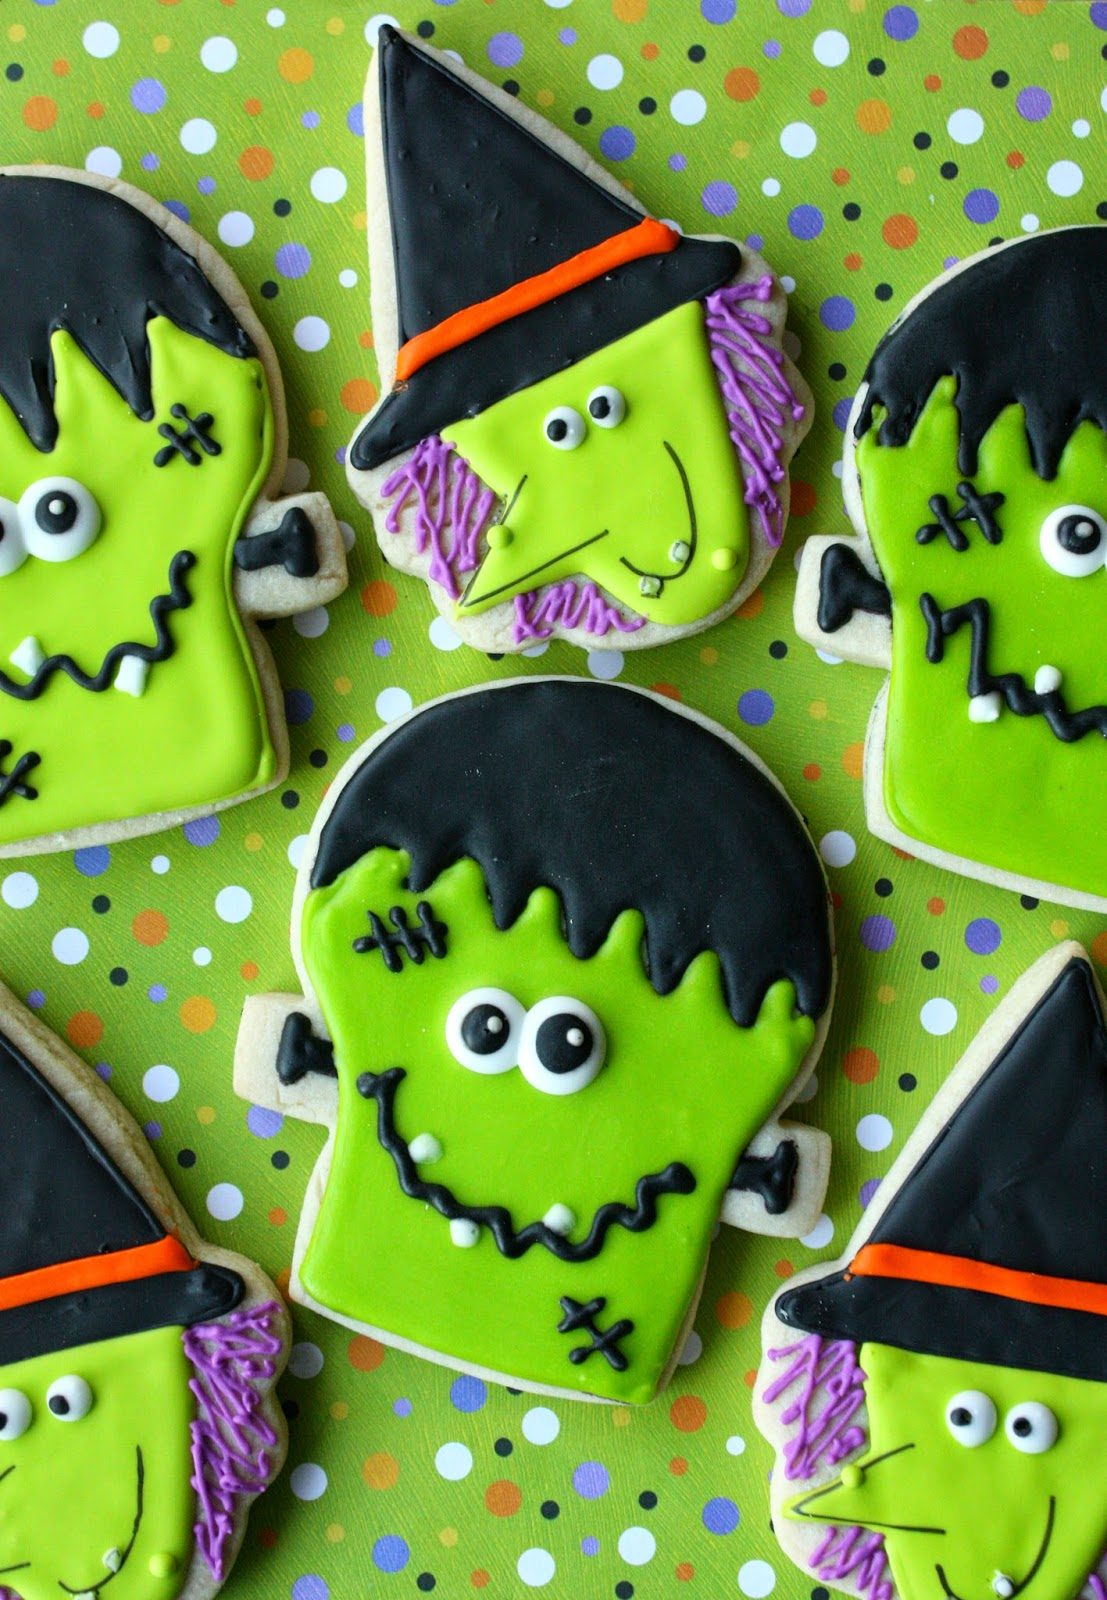
I have had so much fun making Halloween cookies in years past, especially Frankenstein, but wanted to do a little something different for him this year. I shuffled through my cookie cutters to see if I could use one that I had on hand to create another Frankenstein cookie. When I pulled out the Snowman head (with the top hat), the brim of the hat jumped out at me (see above, left) as the perfect spot to place the bolts on the side of his head. All I had to do was turn the cutter upside-down, and it worked perfectly.
I also knew I wanted to make a witch, and once again, a cutter just jumped out at me! The ice cream cutter is perfect for the witch’s pointy hat! It also needed to be turned upside-down.
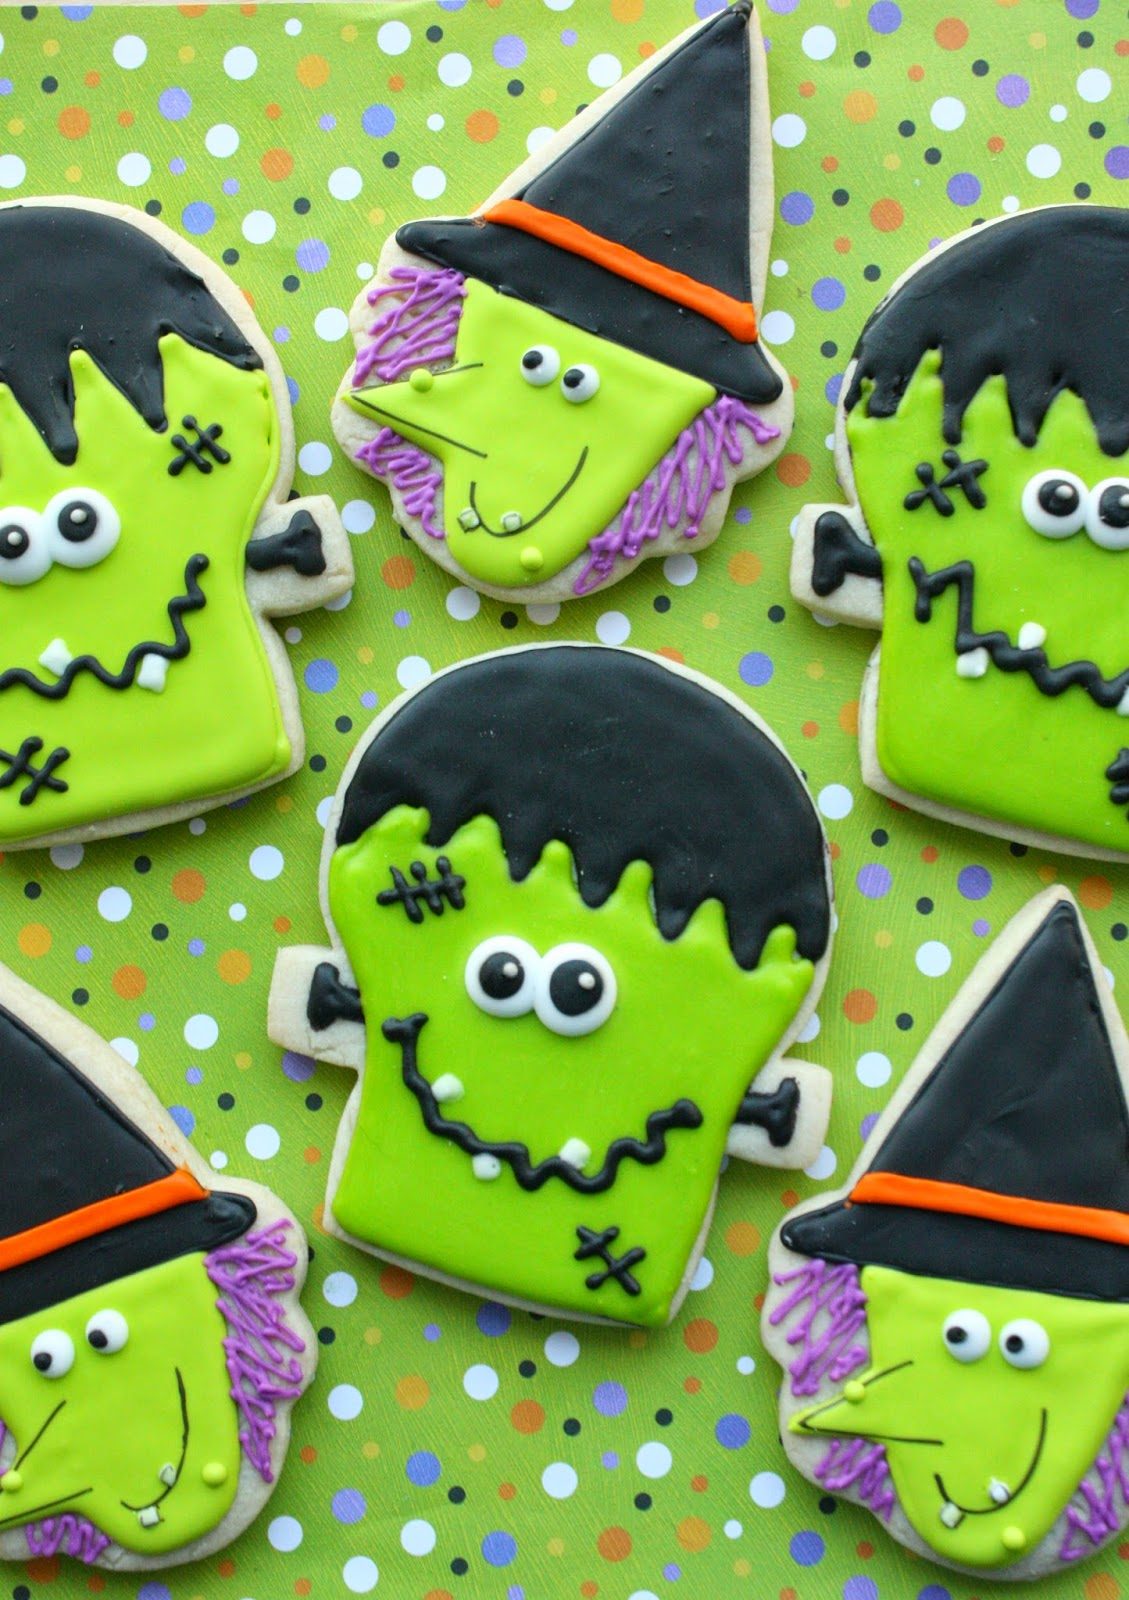 These cookies were made for the 3rd Annual Go Bo Foundation Bake Sale! 426 “cookie artists” representing every U.S. state and 20 countries contributed their cookies to the sale started by the amazing Jill of Jill FCS, in Sister Bay, Wisconsin. The proceeds of The Bake Sale will help continue Bo’s legacy of helping children with cancer.
Cookie Ingredients:
Black, purple, electric orange, electric green food coloring gels (AmeriColor)
Decorating bags
#1,2,3 tips
Black food marker (FoodDoodler fine tip)
Frankenstein Cookies:
1. Roll out dough about 3/8 inch thick and use cutter to cut out cookies and transfer to parchment lined baking sheet with spatula.
2. Bake according to recipe, and let cookies cool completely on cooling rack.
3. Using the black royal icing and a #3 tip, outline and fill the monster’s hair. Let dry for a couple of hours to prevent “bleeding”.
4. Using a #3 tip and the green royal icing, outline and fill the monster’s face. Let dry for 6-8 hours or overnight.
5. Using the black royal icing and a # 1 or #2 tip, add the black facial features, including the side bolts.
6. Making sure the mouth is dry, add the teeth and the whites of the eyes. Immediately add the black detail to the eyes with a #1 tip. (Add the white dot after the black has completely dried.)
7. Let cookies dry completely.
Witch Cookies:
For steps # 1 and #2, follow directions above.
3. Use the black royal icing with a #3 tip and outline and fill the hat. Let it dry for a couple of hours (or more) to prevent “bleeding”.
4. Use the green icing and a #2 tip to outline and fill the witch’s face.
5. Let the face dry for an hour or two and then add the purple hair detail with a #1 tip.
6. Add the eyes with white royal icing and a #1 tip, immediately followed by the black eye detail.
7. Add the orange detail to the hat with the orange royal icing.
8. Leave the cookies to dry for 6-8 hours or overnight.
9. Using the black food marker, add the nose and moth details.
10. With the green royal icing and #1 tip, add the warts,
11. With the white icing and #1 tip, add the teeth. (When the teeth dry, you may outline in black marker if you’d like, or even add hair to the warts, haha!)
HAVE FUN!
(P.S. I still do like my birthday and Christmas too! :))